How to Secure a Website With the .htaccess file
Every website owner needs to draw up a strategy to deal with attacks such as Cross-Site Scripting, Local File Inclusion and SQL Injection which all start with transmission of hostile commands via the HTTP Request. One challenge in dealing with this kind of issue is how to separate legitimate requests from those that are hostile or malicious.
In this guide, we cover the following:
- What is an .htaccess file?
- How to know if mod_rewrite is enabled?
- How to verify that .htaccess is enabled?
- What types of rules can the .htaccess file contain?
- Commenting the .htaccess code
- Force https security on website
- Enable Basic Rewriting
- Disable Directory Browsing
- Set A Default Index Page
- Redirecting www Requests
- Custom Error Documents
- Stop Hotlinking
- Block Evil Robots, Site Rippers
- Block empty user agents and empty HTTP referrers
- Disable the Server Signature
- Permanently Redirect a Specific IP
- HTTP Headers to Help Secure Your Website
- X-XSS-Protection
If the website is hosted on an Apache server, there is a powerful mechanism available to help mitigating attacks: that is the Apache .htaccess file. When properly configured, the .htaccess file on a server with mod_rewrite enabled can provide a robust defense against many HTTP Request attacks.
The .htaccess file is very powerful; therefore it is recommended that there be a full backup of your website before you start editing your .htaccess file. The slightest syntax error can result in an internal server malfunction and usually you’ll get a 500 error (Internal Server Error) message. Once you are done it is very important to verify your entire website’s functionality.
Note: if you’re using Notepad for editing purposes, which I DO NOT recommend, turn off word-wrap and when saving the .htaccess file make sure to save it as:
File Type: All Files (not as a text document or it wont work).
Name of file: .htaccess
More from our blog:
3 Important SEO Considerations Good for E-Commerce Websites
20 Ways You Can Reduce Your Website Bounce Rate
How A Plugin Installation Can Crash Your WordPress Website
What is an .htaccess file?
The .htaccess file or distributed configuration file is a plain text file containing a list of configuration directives (rules) and provides a way to make configuration changes on a per-directory basis.
A website can have more than one .htaccess file, i.e. specific instructions may be applied at individual directory level. The .htaccess file will be read on every HTTP Request submitted to the web server. Changes made to this file take immediate effect.
If the website is hosted on an Apache server, your hosting company should allow the use of .htaccess files. If your host does not allow the use of .htaccess files, Ii will be recommended that you change to one that does. On Todhost, you can use the .htacess file.
How to know if mod_rewrite is enabled?
If you don’t have shell (or other) access to the apache configuration file (httpd.conf) and the host supports php, just paste the text below into a text editor and save the file as info.php in your public_html path.
<?php
phpinfo();
?>
Next run info.php from a browser. Scroll down to the Apache section and check Loaded Modules. Once you’ve obtained the necessary info, delete info.php from your server.
Another simple way to verify if mod_rewrite is enabled consists of creating a single redirect to test it. Add the following lines to the top of your .htaccess file and re-upload it to your server.
RewriteEngine on
1. RewriteRule testpage\.html https://www.google.com [R]
Once the .htaccess file has been updated, enter the following into your browser:
https://www.yoursite.com/testpage.html
Replace www.yoursite.com with your actual website name. This should automatically redirect you to Google. If this redirect works, then mod_rewrite is working on your server.
How to verify that .htaccess is enabled?
It will be rare for the .htaccess not to be enabled on your site. If you have access to the server configuration files, it’s quite easy to fix; open your httpd.conf in a text editor (without word-wrap enabled), and locate the section.
Locate the line that reads..
AllowOverride None
And change it to:
AllowOverride All
Restart Apache. Now .htaccess should work.
If there are any of these that you cannot do, simply contact your web host to get things done for you. If you don’t have access to the server configuration files then you’re probably on a shared hosting platform and if your .htaccess file doesn’t work then you’ll need to contact your web hosting provider to request their support.
If you don’t have FTP or cPanel access to your website, DO NOT upload or create a .htaccess file(s). Seek assistance from your hosting company instead as you might create a 500 error (Internal Server Error) and once this occurs you won’t be able to access the site through a browser anymore.
What types of rules can the .htaccess file contain?
The most common security related directives (rules) .htaccess may contain are:
- Authorization or authentication (username/password) control at directory level
- Use of allow/deny rules to block users by IP address or domain
- Customized error responses – e.g. page not found (404)
- Directory listing – what to do if a directory rather than a page is requested
- URL Rewriting – can be used for a number of purposes including search engine optimization (SEO), redirection of moved content, hot linking and security processing of the HTTP Request.
Commenting the .htaccess code
Comments in the .htaccess file are allowed on a per-line basis, each line of comments is preceded by the # (pound) sign. Comments running over several lines require thus multiple # signs. It’s also advised to use only letters, numbers, dashes, and underscores in the comments. This safe practice will help in avoiding potential server parsing errors.
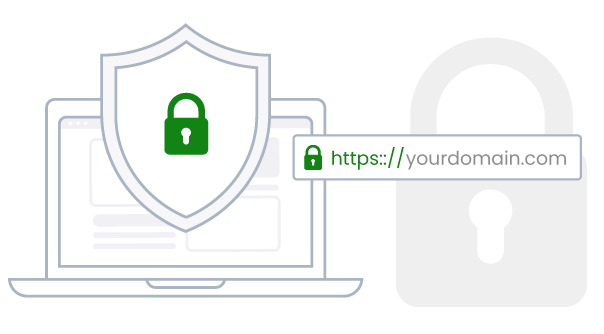
How to Force https security on website
You can enable https on your website by pasting the code below into your .htaccess file
RewriteEngine On
RewriteCond %{HTTPS} off
RewriteRule ^(.*)$ https://%{HTTP_HOST}%{REQUEST_URI} [L,R=301,NE]
Header always set Content-Security-Policy “upgrade-insecure-requests;”
Enable Basic Rewriting
To ensure mod_rewrite (basic rewriting) is enabled on your site, add the following line to your site’s root htaccess file:
# enable basic rewriting
1. RewriteEngine on
Enable Symbolic Links
Enable symbolic links (symlinks) by adding the following directive to the .htaccess file.
# enable symbolic links
1. Options +FollowSymLinks
Some web hosting companies may have swapped FollowSymLinks to SymLinksIfOwnerMatch due to security reasons. Check with your provider which directive should be used.
Deny Access to .htaccess
If you attempt to access the .htaccess file it will result in a 403 error message.
# locked htaccess file
1. < Files .htaccess>
2. order allow,deny
3. deny from all
4. allow from xxxx IP address
5. < /Files>
Order allow,deny rule
Order allow,deny is a setting in your Apache web server configuration that is used to allow or restrict access to certain parts or the whole of a website.
The allow directive affects who can access an area of the server or website. Access is usually controlled by hostname, IP address, or IP address range.
The deny directive restricts access to the server. Restrictions can be based again on hostname, IP address, or environment variables.
Order allow,deny tells your server that the allow rules are processed before the deny rules. If the client does not match the allow rule or it does match the deny rule, then the client will be denied access.
Order deny, allow means that the deny rules are processed before the allow rules. If the client does not match the deny rule or it does match the allow rule, then it will be granted access.
Deny Access to a Specific File
Similar to the above example you can restrict access to a specific file by simply adding the following code. Edit the file name accordingly.
# deny viewing of a specific file
<files myfile.png>
order allow,deny
deny from all
</files>
Deny Access to Multiple File Types
To restrict access to certain file types, add the following code and edit the file types you wish to protect. As you might notice you need to escape the dot (.) this is done by typing a backslash (\) in front of the character that needs escaping.
<FilesMatch “\.(htaccess|ini|log)$”>
Order allow,deny
deny from all
</FilesMatch>
Disable Directory Browsing
If there is no default index page on your site root folder, everything within the root of your site will be accessible to all visitors. Disabling directory browsing will instruct the server to display a “403 Forbidden – Authorization Required” message for any request to view a directory. To disable directory browsing, use the following directive:
# deny directory browsing
1. Options All -Indexes
To re-enable directory browsing, use the following directive:
# allow directory browsing
1. Options All +Indexes
To prevent the server from listing directory contents, use the following directive:
# deny folder listing
1. IndexIgnore *
The IndexIgnore directive can also be used to prevent the display of select file types. Here is the directive:
# no display of select file types
1. IndexIgnore *.wmv *.mp4 *.avi *.etc
Deny Access to a Specific Directory / Folder
Restricting directory / folder access is probably one of the most frequently used .htaccess techniques. To deny all requests for the restricted directory or folder, prepare a .htaccess file in that directory and put the following directive in it:
# deny directory access and allow your IP
IndexIgnore .htaccess * */.??* *~ *#
DirectoryIndex index.php index.html
RewriteCond %{REMOTE_ADDR} !^xxx\.xxx\.xxx\.xxx
RewriteRule .* – [F,L]
RewriteCond %{HTTP_HOST} .
RewriteCond %{HTTP_HOST} !^yourdomain\.com
RewriteRule (.*) https://yourdomain.com/directory_to_deny_access_to/$1 [R=301,L]
Set A Default Index Page
The rule below tells the server to display “content.html” as the default directory index.
# display other default index page
DirectoryIndex content.html
This rule is similar, but the server will search the root folder for the listed files and load the first match it encounters.
# show first available default index page from list
DirectoryIndex index.html index.php default.html
Redirecting www Requests
Redirect www.yoursite.com HTTP requests to yoursite.com using a 301 redirect.
RewriteCond %{HTTP_HOST} .
RewriteCond %{HTTP_HOST} !^yoursite\.com
RewriteRule (.*) https://yoursite.com/$1 [R=301,L]
If your site uses HTTPS, then this code will need to be modified to preserve the http / https in the incoming requests.
RewriteCond %{HTTP_HOST} .
RewriteCond %{HTTP_HOST} !^yoursite\.com
RewriteCond %{SERVER_PORT}>s ^(443>(s)|[0-9]+>s)$
RewriteRule (.*) https://yoursite.com/$1 [R=301,L]
Custom Error Documents
The .htaccess file is where you can configure error documents:
# serve custom error pages
ErrorDocument 400 /errors/400.html
ErrorDocument 401 /errors/401.html
ErrorDocument 403 /errors/403.html
ErrorDocument 404 /errors/404.html
ErrorDocument 500 /errors/500.html
Password-protect Files / Directories
Secure the site contents by requiring user authentication for specified files and/or directories.
Adjust the AuthName field to suit your needs: members only , admin section …
# password-protect single file
<Files admin.php>
AuthType basic
AuthName “Admin Panel”
AuthUserFile /home/path/.htpasswd
Require valid-user
</Files>
Password protect multiple files
# password-protect multiple files
<FilesMatch “^(index|secure|backup)*$”>
AuthType basic
AuthName “Dev”
AuthUserFile /home/path/.htpasswd
Require valid-user
</FilesMatch>
Password-protect the directory in which this htaccess rule resides
# password-protect the directory in which this htaccess rule resides
AuthType basic
AuthName “This directory is protected”
AuthUserFile /home/path/.htpasswd
AuthGroupFile /dev/null
Require valid-user
Allow or Deny by IP Address and/or Domain
Deny access to everyone except your LAN and domain.com:
# no one gets in
order deny,allow
deny from all
allow from .*domain\.com.*
Sometimes, you will only want to ban a single IP, a persistent bot or a forum spammer …
order allow,deny
#Botnet controller
deny from 78.109.29.112
allow from all
There are different ways to block a range of IP’s via the .htaccess file.
By their CIDR number – 76.73.0.0/17
By truncating digits until the desired IP range is obtained – 76.73.0.* – blocks all IP’s between 76.73.0.0 and 76.73.0.255
order allow,deny
#FakeGoogleBots-ProxyHijacks
deny from 76.73.0.0/17
deny from 76.73.0.*
deny from 76.73.*.*
deny from 76.*.*.*
allow from all
Block an IP address range
It is possible to block an entire range of IP addresses. Below are a few examples illustrating proper .htaccess syntax:
order allow,deny
# block a partial domain via network/netmask values
deny from 76.73.0.0/255.255.0.0
# block domain.com but allow sub.domain.com
deny from domain.com
allow from sub.domain.com
#RFI attacks
deny from 70.86.235.162
deny from 72.249.108.140
deny from 81.176.226.194
allow from all
Stop Hotlinking
Bandwidth theft or hotlinking is direct linking to a web site’s files, usually images, video, etc…
Example: You’ve got some pictures illustrating an article and someone else uses an <img> tag to show that image on their webpage page instead of hosting the image themselves.
Bandwidth refers to the amount of data transferred from a web site to a user’s computer. When you visit a web page, you are using that site’s bandwidth to display the files. Depending on your web hosting provider, if a site is over its monthly bandwidth, the owner gets billed for the extra data or the site might be taken offline.
To stop hotlinking of your images from other sites and display a replacement image called hotlink.gif, place this code in your .htaccess file:
0. RewriteEngine On
1. # stop hotlinking
2. RewriteCond %{HTTP_REFERER} !^$
3. RewriteCond %{HTTP_REFERER} !^http(s)?://(www\.)?mysite\.com/ [NC]
4. RewriteCond %{REQUEST_URI} !^/hotlinking/hotlink\.gif$
5. RewriteRule \.(gif|jpe?g|bmp|swf)$ /hotlinking/hotlink.gif [NC,L]
Allow hotlinking from a couple of websites can be done in two ways, either put each domain on its own line or simply put several keywords separated by a pipe (|) character.
00. RewriteEngine On
01. # stop hotlinking
02. RewriteCond %{HTTP_REFERER} !^$
03. RewriteCond %{HTTP_REFERER} !^http(s)?://(www\.)?mysite\.com/ [NC]
04. # allow myspace and facebook
05. RewriteCond %{HTTP_REFERER} !^https://(www\.)?myspace\.com [NC]
06. RewriteCond %{HTTP_REFERER} !^https://(www\.)?facebook\.com [NC]
07. # allow different subdomains from mail.live.com
08.RewriteCond %{HTTP_REFERER} !^https://([^.]+\.)+mail\.live\.com [NC]
09. # allow several search engines
10. RewriteCond %{HTTP_REFERER} !(google|msn|bing|bingj|yahoo|ask)\. [NC]
11. RewriteCond %{REQUEST_URI} !^/hotlinking/hotlink\.gif$
12. RewriteRule \.(gif|jpe?g|bmp|swf)$ /hotlinking/hotlink.gif [NC,L]
To deliver a standard or custom error page instead of a replacement image, replace the line containing the RewriteRule in the above htaccess directive with the following line:
0. # serve a standard 403 forbidden error page
1. RewriteRule \.(gif|jpe?g|bmp|swf)$ – [F,L]
You can also get an excellent PHP script called Auto-HotLink. What I like most about it: It logs the HTTP requests so you can actually see who’s hotlinking your files.
Block Evil Robots, Site Rippers …
The block of code below will block some unwanted junk from accessing your website. Any listed user agents will be denied access and receive an error message instead. Below are a couple of examples of user agents you really don’t want to access your site.
Note: DO NOT include the “[OR]” on the very last RewriteCond or your server will crash, delivering 500 Errors to all page requests.
00. RewriteBase /
01. # useragents starting with
02. RewriteCond %{HTTP_USER_AGENT} ^atraxbot [NC,OR]
03. RewriteCond %{HTTP_USER_AGENT} ^Azureus [NC,OR]
04. RewriteCond %{HTTP_USER_AGENT} ^geohasher [NC,OR]
05. RewriteCond %{HTTP_USER_AGENT} ^PycURL [NC,OR]
06. RewriteCond %{HTTP_USER_AGENT} ^Python-urllib [NC,OR]
07. RewriteCond %{HTTP_USER_AGENT} ^research-scan-bot [NC,OR]
08. RewriteCond %{HTTP_USER_AGENT} ^Sosospider [NC,OR]
09. RewriteCond %{HTTP_USER_AGENT} ^Wget [NC,OR]
10. RewriteCond %{HTTP_USER_AGENT} ^xenu [NC,OR]
11. # user agent contains string
12. RewriteCond %{HTTP_USER_AGENT} ^.*casper [NC,OR]
13. RewriteCond %{HTTP_USER_AGENT} ^.*goblox [NC,OR]
14. RewriteCond %{HTTP_USER_AGENT} ^.*sun4u [NC]
15. RewriteRule ^(.*)$ – [F]
You can also include specific referrers by using HTTP_REFERER or block requests from a particular remote host using REMOTE_HOST:
0. RewriteBase /
1. # block amazon cloud
2. RewriteCond %{HTTP_REFERER} ^https://(([^.]+\.)+)?amazonaws\.com [NC,OR]
3. RewriteCond %{REMOTE_HOST} ^.*\.amazonaws\.com$ [NC,OR]
4. # block remote hosts starting with mail or smtp
5. RewriteCond %{REMOTE_HOST} ^mail(.*)\. [NC,OR]
6. RewriteCond %{REMOTE_HOST} ^smtp(.*)\. [NC]
7. RewriteRule ^(.*)$ – [F]
Block Semalt (semalt.com) Referrer Spam. The directive below will block all traffic coming from semalt.com and any subdomain (semalt.semalt.com)
0. RewriteBase /
1. # block semalt referrer spam
2. RewriteCond %{HTTP_REFERER} ^https://(([^.]+\.)+)?semalt\.com [NC]
3. RewriteRule ^(.*)$ – [F]
Instead of delivering a friendly error message you could also send these bad boys to a (bad) website of your choice by replacing the RewriteRule in the last line with the name of the domain where you want to redirect them to.
Block empty user agents and empty HTTP referrers
There are times you want to block empty user agents and empty HTTP referrers as there’s no reason for browsers to request only images from your website and if those requests show up with an empty user agent and HTTP referrer, it’s most certainly a bot that’s scraping those images. The directive below will stop such requests.
0. # Blank UA and Referer
1. RewriteCond %{HTTP_REFERER} ^$ [NC]
2. RewriteCond %{HTTP_USER_AGENT} ^$ [NC]
3. RewriteRule ^(.*)\.(ico|gif|jpe?g|png|bmp|swf)$ – [F,L]
If you wish to apply this rule to all your pages, no matter which content is requested, replace the above RewriteRule with the code below:
0. RewriteRule .* – [F,L]
Disable the Server Signature
To remove the server signature which is displayed as part of the default Apache error documents, use the following code:
0. ServerSignature Off
Permanently Redirect a Specific IP
Sometimes you want to create a permanent redirect (301) when the request is coming from a particular IP. In other words, if someone from 123.45.67.8 visits the website, the visitor will be redirected to Google for example. All other visitors will be able to access the site.
0. RewriteEngine On
1. RewriteCond %{REMOTE_ADDR} ^123\.45\.67\.8$
2. RewriteRule ^(.*)$ https://google.com [L]
Permanently Redirect Multiple IP’s
Sometimes you might want to redirect multiple IP addresses to another URL, preventing access to your website from those IP’s. One way of doing this is to add [OR] to the end of the first RewriteCond and add another IP on the next line. Do NOT place an [OR] on the final RewriteCond.
0. RewriteEngine On
1. RewriteCond %{REMOTE_ADDR} ^123\.45\.67\.8$ [OR]
2. RewriteCond %{REMOTE_ADDR} ^123\.110\.253\.195$ [OR]
3. RewriteCond %{REMOTE_ADDR} ^123\.8\.67\.54$
4. RewriteRule ^(.*)$ https://google.com [L]
Allow Multiple IP’s and Redirect Everyone Else
During site development for example you might want to allow the administrators / developers to access the frontend of the CMS and redirect other visitors to a maintenance page. The rules are pretty similar to the above ones, except that when using a negation sign – ! – you DON’T add the [OR] to the end of the RewriteCond.
0. RewriteEngine On
1. #Allow the IP’s below to access the CMS frontend and redirect visitors to offline.html
2. RewriteCond %{REMOTE_ADDR} !^123\.45\.67\.89$
3. RewriteCond %{REMOTE_ADDR} !^98\.76\.54\.32$
4. RewriteCond %{REQUEST_URI} !/offline\.html$ [NC]
5. RewriteRule ^(.*)$ /offline\.html [R=302,L]
Using the above rules you can also prevent a visitor from a particular IP from accessing a specific page on your site and redirect the visitor to Google.
0. RewriteEngine On
1. RewriteCond %{REMOTE_ADDR} ^123\.45\.67\.8$
2. RewriteCond %{REQUEST_URI} /a-particular-requested-page\.html$
3. RewriteRule ^(.*)$ https://google.com [L]
Or to another page …
0. RewriteEngine On
1. RewriteCond %{REMOTE_ADDR} ^123\.45\.67\.8$
2. RewriteCond %{REQUEST_URI} /a-particular-requested-page\.html$
3. RewriteRule .* /a-page-made-for-you.html [R=301,L]
You could also redirect multiple IP’s to a PHP script which will send them to different destinations. When someone is abusing your website you could for example redirect them to the acceptable use policy (AUP) of their webhost.
0. RewriteEngine On
1. RewriteCond %{REMOTE_ADDR} ^123\.45\.67\.8$ [OR]
2. RewriteCond %{REMOTE_ADDR} ^123\.110\.253\.195$ [OR]
3. RewriteCond %{REMOTE_ADDR} ^123\.8\.67\.54$
4. RewriteCond %{REQUEST_URI} !/myscript\.php$ [NC]
5. RewriteRule ^(.*)$ myscript.php [R=301,L]
Enhanced .htaccess Directives
Below are a couple of rules initially posted on 0x000000.com, a white hacker website, according to a post there, they will help in blocking attacks against your server.
We took out a single quote / apostrophe (‘) in the rule on line 05 that “blocks out the use of illegal or unsafe characters in the Referer Variable of the HTTP Request”. The quote may appear in a search query as seen below and thus innocently block the visitor.
google.com/search?….&q=pdf+parser+’FlateDecode+decompress+failed’
00. # Prevent use of specified methods in HTTP Request
01. RewriteCond %{REQUEST_METHOD} ^(HEAD|TRACE|DELETE|TRACK) [NC,OR]
02. # Block out use of illegal or unsafe characters in the HTTP Request
03. RewriteCond %{THE_REQUEST} ^.*(\\r|\\n|%0A|%0D).* [NC,OR]
04. # Block out use of illegal or unsafe characters in the Referer Variable of the HTTP Request
05. RewriteCond %{HTTP_REFERER} ^(.*)(<|>|’|%0A|%0D|%27|%3C|%3E|%00).* [NC,OR]
06. # Block out use of illegal or unsafe characters in any cookie associated with the HTTP Request
07. RewriteCond %{HTTP_COOKIE} ^.*(<|>|’|%0A|%0D|%27|%3C|%3E|%00).* [NC,OR]
08. # Block out use of illegal characters in URI or use of malformed URI
09. RewriteCond %{REQUEST_URI} ^/(,|;|:|<|>|”>|”<|/|\\\.\.\\).{0,9999}.* [NC,OR]
10. # Block out use of empty User Agent Strings
11. # NOTE – disable this rule if your site is integrated with Payment Gateways such as PayPal
12. RewriteCond %{HTTP_USER_AGENT} ^$ [OR]
13. # Block out use of illegal or unsafe characters in the User Agent variable
14. RewriteCond %{HTTP_USER_AGENT} ^.*(<|>|’|%0A|%0D|%27|%3C|%3E|%00).* [NC,OR]
15. # Measures to block out SQL injection attacks
16. RewriteCond %{QUERY_STRING} ^.*(;|<|>|’|”|\)|%0A|%0D|%22|%27|%3C|%3E|%00).*(/\*|union|select|insert|cast|set|declare|drop|update|md5|benchmark).* [NC,OR]
17. # Block out reference to localhost/loopback/https://www.linkedin.com/redir/invalid-link-page?url=127%2e0%2e0%2e1 in the Query String
18. RewriteCond %{QUERY_STRING} ^.*(localhost|loopback|127\.0\.0\.1).* [NC,OR]
19. # Block out use of illegal or unsafe characters in the Query String variable
20. RewriteCond %{QUERY_STRING} ^.*(<|>|’|%0A|%0D|%27|%3C|%3E|%00).* [NC]
Many websites, about 70-80%, are vulnerable against LFI attacks and hackers will attempt to exploit this to get a shell on the server. Below is an example of php code that is vulnerable to LFI:
0. <?php
1. // LFI Vulnerable Code
2. $redirect = $_GET[redirect];
3. include($redirect);
4. ?>
The code below, graciously provided by SigSiu.net, should help against Local and Remote File Inclusion attacks.
0. ########## Begin – File injection protection, by SigSiu.net
1. RewriteCond %{REQUEST_METHOD} GET
2. RewriteCond %{QUERY_STRING} [a-zA-Z0-9_]=https:// [OR]
3. RewriteCond %{QUERY_STRING} [a-zA-Z0-9_]=(\.\.//?)+ [OR]
4. RewriteCond %{QUERY_STRING} [a-zA-Z0-9_]=/([a-z0-9_.]//?)+ [NC]
5. RewriteRule .* – [F]
6. ########## End – File injection protection
In addition to the above rules you might want to add the one below in case they use URL encoding in the https:// part.
0. RewriteCond %{QUERY_STRING} [a-zA-Z0-9_]=http%3A%2F%2F [OR]
Adding the following directive in the .htaccess file should give you an additional layer of security against this type of attacks using the proc/self/environ method.
0. #proc/self/environ? no way!
1. RewriteCond %{QUERY_STRING} proc\/self\/environ [NC,OR]
Apache HTTP Server CVE-2011-3192 Denial Of Service Vulnerability
The directive below will help against the Apache HTTP Server CVE-2011-3192 Denial Of Service Vulnerability discovered in August 2011 if you can’t update Apache to the latest version.
0. # drop Range header when more than 5 ranges.
1. # CVE-2011-3192
2. SetEnvIf Range (,.*?){5,} bad-range=1
3. RequestHeader unset Range env=bad-range
4. # optional logging.
5. #CustomLog insert-path-and-name-of-log common env=bad-range
PHP-CGI Remote Code Execution Bug (CVE-2012-1823)
The directive below will help against the PHP-CGI Remote Code Execution Bug (CVE-2012-1823) discovered on the 3rd May 2012 by Security Researchers from Eindbazen
0. # PHP-CGI Vulnerability
1. RewriteCond %{QUERY_STRING} ^(%2d|\-)[^=]+$ [NC]
2. RewriteRule (.*) – [F,L]
HTTP Headers to Help Secure Your Website
Preventing cross-site request forgery (CSRF) attacks is hard and web applications must be built to prevent CSRF vulnerabilities. The first vulnerability is cross-site scripting (XSS).
Around 40.000 web sites have been catalogued by XSSed as being vulnerable to cross-site scripting (XSS). These attacks leave your users open to cookie theft, information theft, account hijacking, clickjacking and more.
Modern web browsers have some powerful protection build in nowadays but you need to tell the browser that you want those protection mechanisms used for your website. This can be archived by setting specific HTTP headers.
X-Frame-Options
The X-Frame-Options HTTP response header can be used to indicate whether or not a browser should be allowed to render a page in a <frame> or <iframe>. This can be used to avoid clickjacking attacks, by ensuring that your content is not embedded into other sites.
This directive is pretty similar to the frame buster code explained in “Double Trouble on Google Images” except that it is only supported in the following browsers:
Internet Explorer 8+
Opera 10.50+
Safari 4+
Chrome 4.1.249.1042+
Firefox 3.6.9+ (or earlier with NoScript)
There are three possible values for this header:
DENY – This setting prevents any pages served from being placed in a frame even if it is on the same website it originates from. should be used if you never intend for your pages to be used inside of a frame.
SAMEORIGIN – This setting allows pages to be served in a frame of a page on the same website. If an external site attempts to load the page in a frame the request will be denied.
ALLOW-FROM origin – If the value contains the token ALLOW-FROM origin, the browser will block rendering only if the origin of the top-level browsing context is different than the origin value supplied with the Allow-From directive.
The code below sets the directive to DENY, preventing our pages from being served in any frames, even from our own website.
0. # Don’t allow any pages to be framed – Defends against CSRF
1. Header set X-Frame-Options DENY
X-XSS-Protection
This header is exclusive to Internet Explorer 8 and 9, it turns on cross site scripting protection in IE 8 and IE 9 which is turned off by default as it could potentially break some websites. To turn on the XSS filter, use the header X-XSS-Protection “1; mode=block”. If you wish to prevent this filter from being turned on for your website set the headers value to “0”;
0. # Turn on IE8-IE9 XSS prevention tools
1. Header set X-XSS-Protection “1; mode=block”
X-Content-Security-Policy
Content Security Policy (CSP) is an added layer of security that helps to detect and mitigate certain types of attacks, including Cross Site Scripting (XSS) and data injection attacks. These attacks are used for everything from data theft to site defacement or distribution of malware. This header is designed to specify how content interacts with your website.
Setting this directive to “allow ‘self’;” will prevent our pages from loading any external JavaScript or running any inline JavaScript. Our website will be safer from XSS attacks as it becomes more difficult for an attacker to run JavaScript in the visitor’s browser through a framed page on our website or through a SQL injection.
There are a lot of settings available for this header. You need to read the Mozilla Wiki page before using CSP as you will have to allow certain external content if you run Google Adsense for example.
0. # Only allow JavaScript from the same domain to be run.
1. # Don’t allow inline JavaScript to run.